Movable Parts held an organizing meeting at the Bike Cage with students of Occidental’s Bike Share last Friday. In conversation we debated about the actual route of CicLAvia this April noting that we’d seen “somewhere” that it will go to Venice. In an attempt to recover a map beyond my hazy memory of one of thousands of Facebook posts, tweets, and emails, I searched the CicLAvia website (to no avail), found blog posts that discuss preliminary information about the route, and then finally landed on it at CicLAvia’s Facebook Page where it was released that same Friday (2/22).
CicLAvia Route Map from LA Streets Blog
The map indicates a route from Union Station to Venice Beach via Main, 6th and 7th, Figeroua, and finally Venice with a barebones post: “Map of the Venice Boulevard route for the April 21, 2013 CicLAvia. Participants will be able to access the route from many entry points and travel the route in either direction.” The LA Streets Blog announced it the previous Thursday and gives us more context: The new route asserts the ability for bikes to “cross the east-west divide” and earlier LA Streets Blog reported, the route is part of an overall strategy to develop routine monthly routes (e.g., April is the Venice ride).
**I also learned from LA Streets Blog that there will be a June CicLAvia. Yay! We’ll bring the movable party.**
We are thrilled to announce that our bike-powered music project will receive funding from the Associated Students of Occidental College’s (ASOC) Renewable Energy and Sustainability Funds. We proposed our Movable Party project as an opportunity for students (from my MUSI112 Digital Music-Cultures class and self-selected student volunteers) at Oxy to work alongside community artists and engineers to construct a human-scale system of power and interactive robotics. Our proposal details the learning goals of project:
This project provides a set of unique learning contexts that focus on applied knowledge, collaboration, and community engagement. Student participants will work under the guidance of community artists, advocates, and professionals in a multidisciplinary project-based environment. Specifically, they will gain hands-on experience of fabricating a complex bicycle-powered generator and components of interactive robotics from raw materials, from design to finish. This experience is particularly valuable at a liberal arts college where engineering and design courses are not offered. In addition, this project provides an access point for Oxy students to engage with local communities while acting as arts and bicycle advocacy partners. This partnership should empower the students to make decisions that would yield a positive impact in the community, beyond campus life.
With the funds, we will purchase the components for building the pedal generator (hub motors, battery, power regulator, copper wire, etc), and the interactive part of the system (sensors and Arduino microcontrollers). Our plan is to gather all of materials this week and start hosting workshops on and off campus throughout the month of March. Fabrication workshops will take place on campus at the Occidental Bike Share/Bike Cage, and off-campus at The Knowhow Shop, a design and fabrication studio and co-op in Highland Park. The specific time and place of workshops will be announced on this website and through Oxy-related channels.
Besides the launch at Ciclavia on April 21, 2013, we are in the process of planning an on-campus launch to raise awareness for green energy and sustainability and introduce our system to the grater Oxy community.
Making this project educational is among our top priorities. We’re excited to work with Oxy to demonstrate the capacity of human-powered energy through creative practices.
One of the goals of Movable Party is to provide an interactive experience for audiences/participants. Since power will be generated from a hub motor attached to the rear wheel of each bike (see this post), the speed of the rear wheel directly translates to the amount of power generated. Detecting how fast the rear wheel is moving thus seems like the most obvious/important piece of data to capture from these stationary, power-generating bikes.
Tachometer
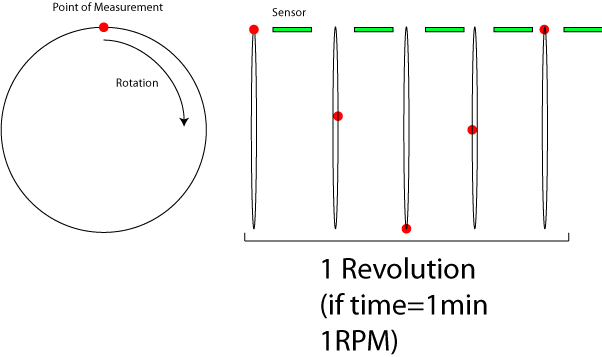
The easiest way to detect the speed of the rear wheel (the way most bike computers work), is to make a tachometer–simply put, a revolution counter. By counting the number of revolutions over a certain period of time, we can determine how fast the wheel is turning. Basically, you want to count the number of times a specific spot on the wheel crosses a point of measurement, and divide by some time constant (e.g. Revolutions per Minute, RPMs). Electronically, you are triggering a switch every time this point on the wheel passes a fixed sensor.
Basic Tachometer Model
Because the wheel is turning and the sensor is fixed, using a mechanical switch where there is contact every rotation will not work very well. For example, the mechanical switch will cause friction every rotation. Also, maintaining perfect distance between the wheel and the switch will be difficult. Instead, there are two common ways of detecting rotation that do not require contact between the sensor and the wheel–optically and magnetically. Due to my own personal familiarity with magnetic circuits, as well as the expense of using an optical system and concerns about the functionality of that system in ambient light, I have decided to pursue magnetic sensing.
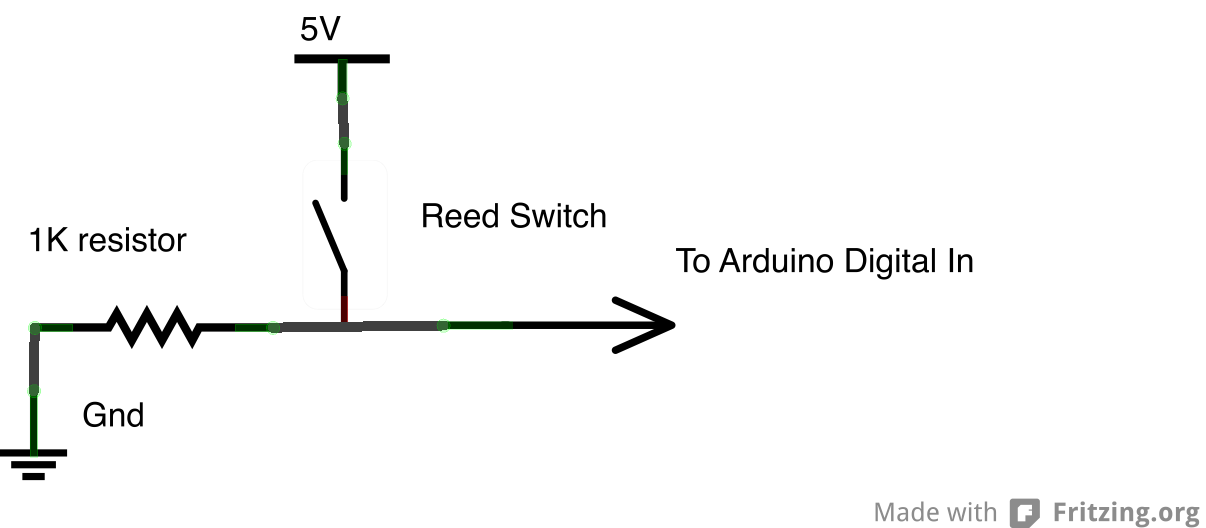
Sensing Changes in Magnetic Fields To construct a tachometer using a magnet, you attach the magnet to the wheel, and attach a sensor to the fork (at a fixed position). As the magnet passes by the sensor, it triggers a switch that allows you to count the number of revolutions over a period of time. There are two types of sensors that accomplish this function: reed switches and Hall effect sensors. The reed switch is a simple switch that is closed (or opened) using a magnet.
Reed Switch Schematic
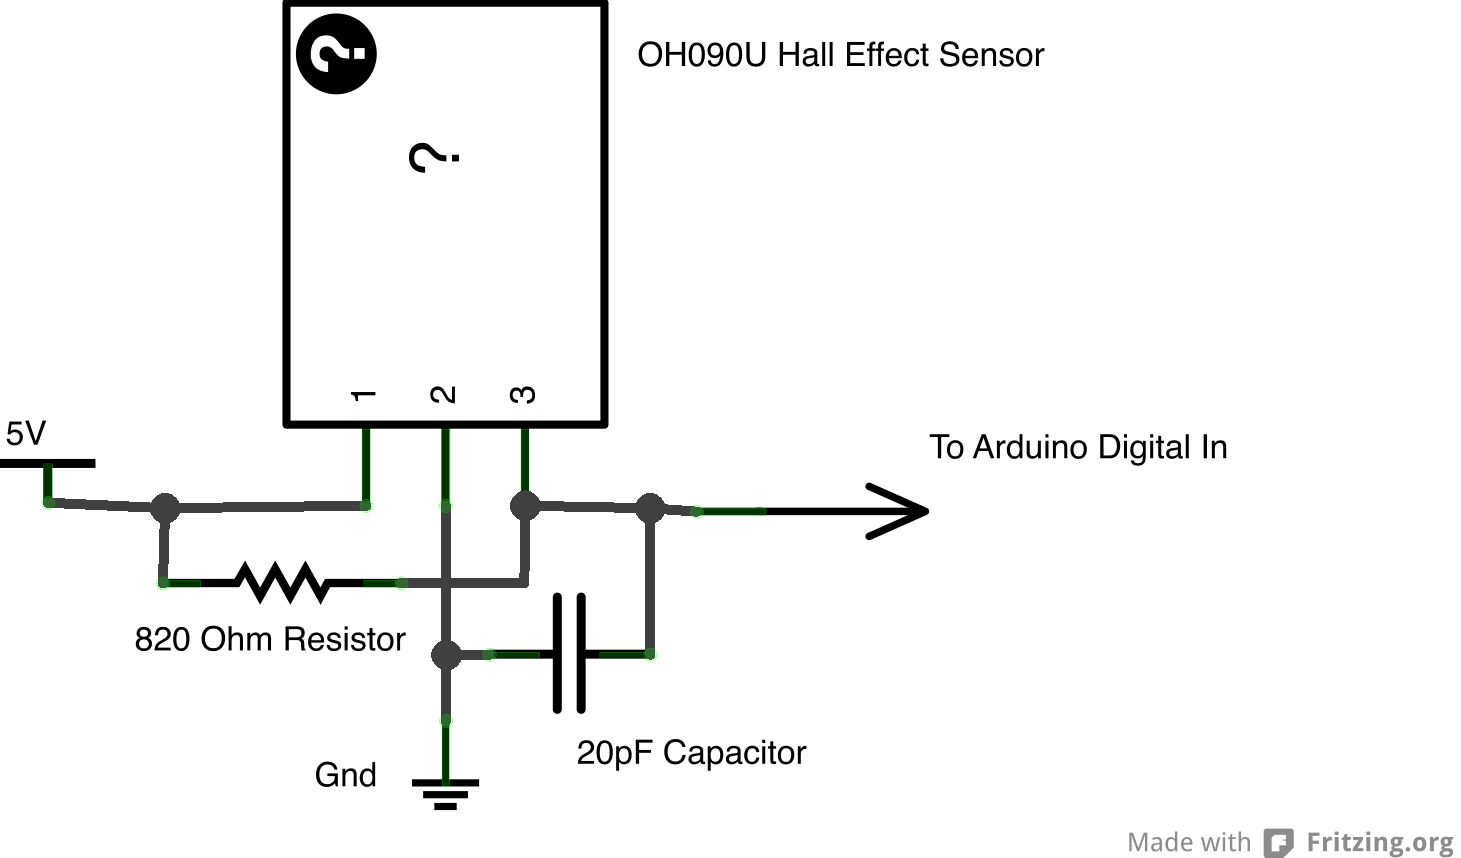
The Hall effect sensor converts changes in magnetic fields to analog voltage. The mystery of how the Hall effect actually works from a scientific standpoint goes beyond my level of understanding as a musician/tinkerer, but for our purposes the sensor functions like a digital switch. (Fritzing, which I used to make the schematic below does not have a built-in part for a Hall Effect sensor, so I am using the “mystery” part)
Hall Effect Schematic
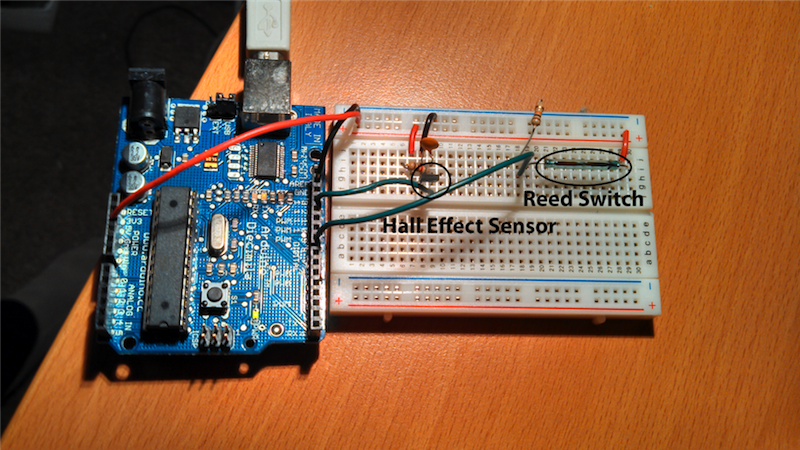
Testing I tested both the reed switch (ORD-229-2530) and the Hall effect sensor (OH090U) with two types of magnets: 1/4″x1/16″ N42 neodymium magnet and 1/2″ x 3/16″ Ceramic Disc Magnet. I hooked both up to a simple sketch on the Arduino so I could see when the switches were open/closed. Neither magnet worked very well with the reed switch unless I was basically touching the switch (conclusion: I would need stronger magnets). Both magnets worked with the Hall effect sensor. The neodymium magnet consistently triggered the switch 1/4″ from the sensor and the ceramic magnet worked 3/8″ from the sensor. I am not sure what kind of sensing distance we will need for the rear wheel of the bike, however if these distances are too small, a stronger/larger magnet should work. My fellow Movable Partiers are working on getting their hands on some magnets from reclaimed bike computers, which hopefully will work well.
Hall effect and reed switch circuits connected to (a very old) Arduino
Next Steps The goal of these preliminary tests was to make sure I could actually build the circuit and get it to work. The next step is to hook it up to a bicycle and make sure we can get an accurate count of rotations. The physical connection to the bicycle represents one challenge that should be figured out sooner rather than later. For the electronics, we will probably need to implement some kind of edge detection code on the Arduino to make sure that we only get one “trigger” every time the magnet passes the sensor. Once this has been accomplished, I will need to program a sketch on the Arduino that allows us to transmit the data to the computer, probably into Max.
Sonic Outcomes
While I enjoy designing and building hardware interfaces that allow interaction between the physical world/computer, I always (try to) keep in mind that the goal of these technologies is to provide meaningful interaction for audience participants. This step of “mapping” is the most critical and most often gets shortchanged due to time constraints. Therefore, it is important to think about the types of mapping we would like to use in parallel with designing/building the system. The most obvious relationship between the rotation of the rear wheel of the bike and music would be to convert RPMs to BPMs. In this paradigm, the speed of the rear wheel would control the speed of playback. Since there will be three bikes, it will be important to think about how the three data streams can work with each other. One idea involves each bike controlling the tempo of a particular track of a song–therefore the parts will only align when everyone is biking at the same speed.
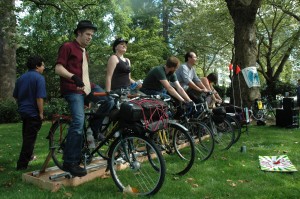
My first human power project, the Seattle Bicycle Music Festival in 2010, was an amazing success. This, in large part, is why I want I’m so excited to put on another show! We built our own generator, inspired by Rock The Bike‘s Biker Bar (which has since been discontinued for reasons I will discuss later). Like the Biker Bar, our generator used a single generator coupled to the bikes by a long tire driven shaft. Like the Biker Bar, our generator folded in half to become an 8 foot long trailer. Unlike the Biker Bar, however, our shaft folded too, allowing us to squeeze five bikes onto the contraption, instead of three! A 90amp VW Bus alternator, with it’s own voltage regulation circuitry built in, converted those pedaler’s work to clean 12V, variable current DC. The volunteer cyclists were able to power all the acts, including quite a loud rock band who brought along three tube amplifiers! We had our share problems though, and I learned a great deal.
The bikes should be on display
Seattle Bicycle Music Festival, Miriam Halsey, 2010
One of the best parts of the bike powered concert is that the folks powering the concert are right next to the band, facing the audience. They’re on display. The audience knows that this is part of they act, and it’s their turn next! With a system like this, the volunteers are close enough to have a conversation with each-other. This, I think, kept people coming back to the bikes more than anything else.
Mechanical transmission is lossy
Setting up at Cal Anderson Park, Chrystal Lin, 2010
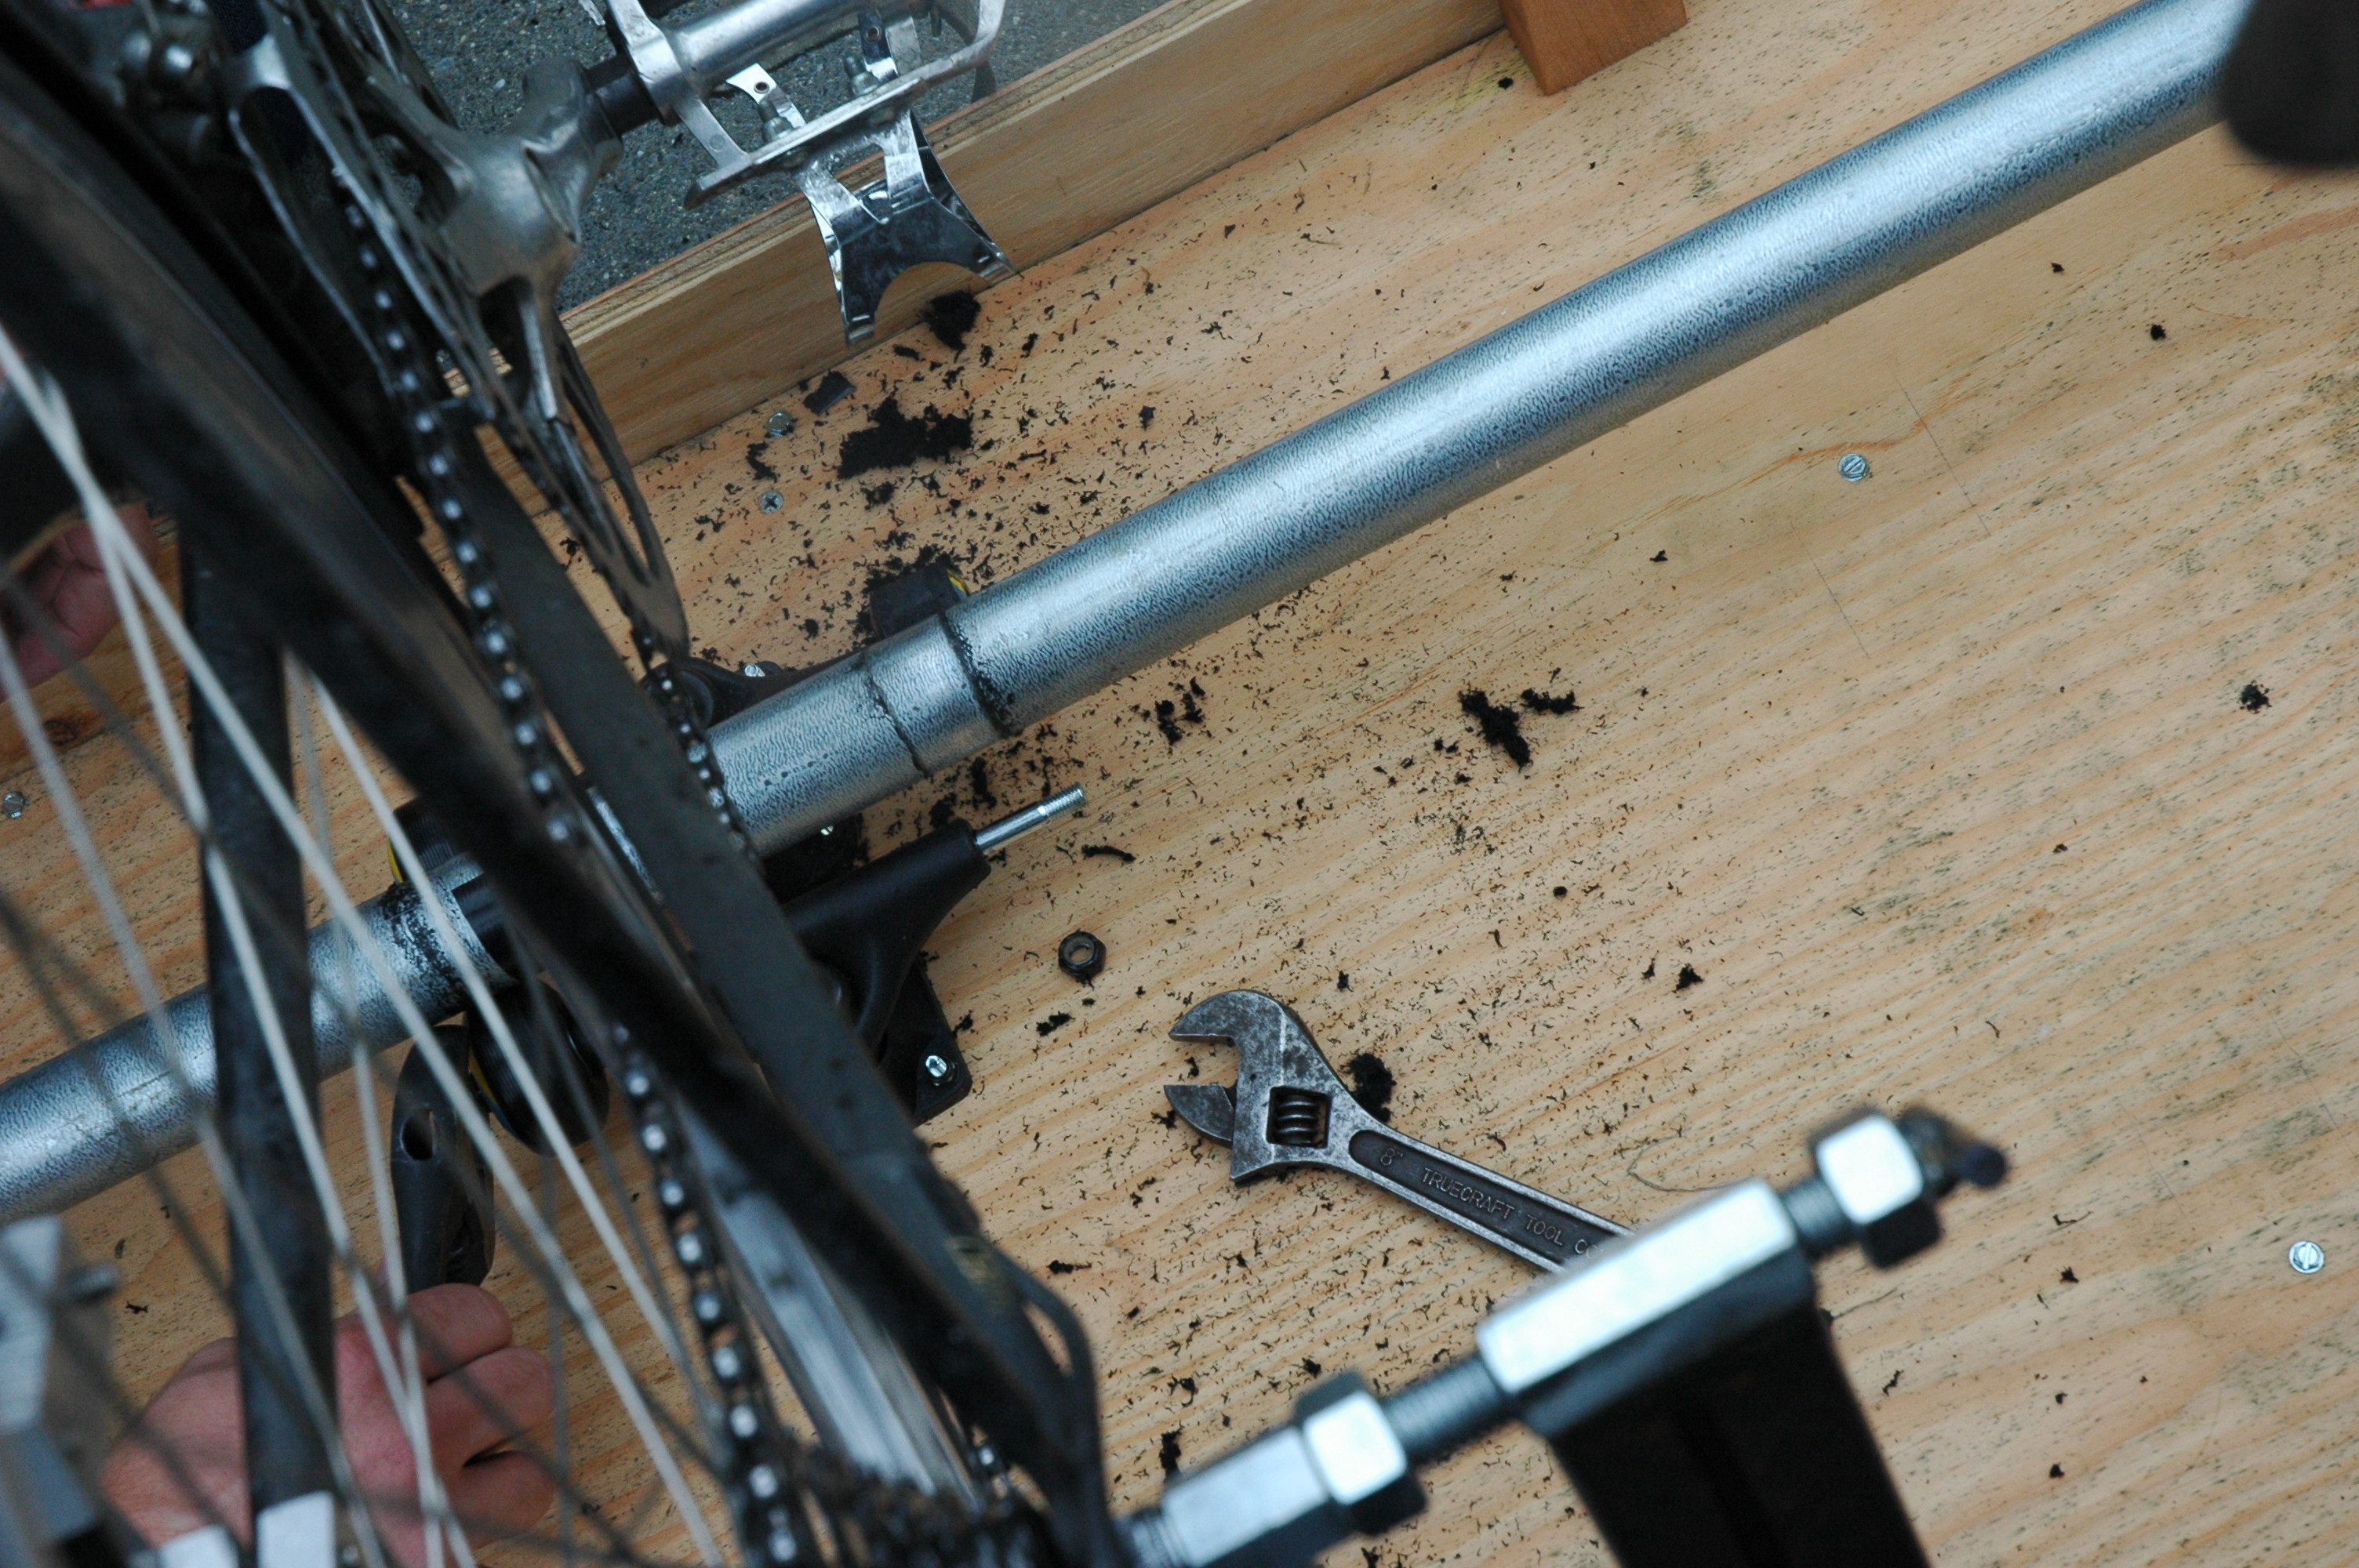
for all it’s simplicity, The common-shaft approach has a major downfall in the form of mechanical losses; the tires contacting the shaft, the support bearings, the flexible shaft couplers, all of these are big energy sinks, which is why Rock the Bike has stopped building their Biker Bar system, and why Movable Parts is using a different system.
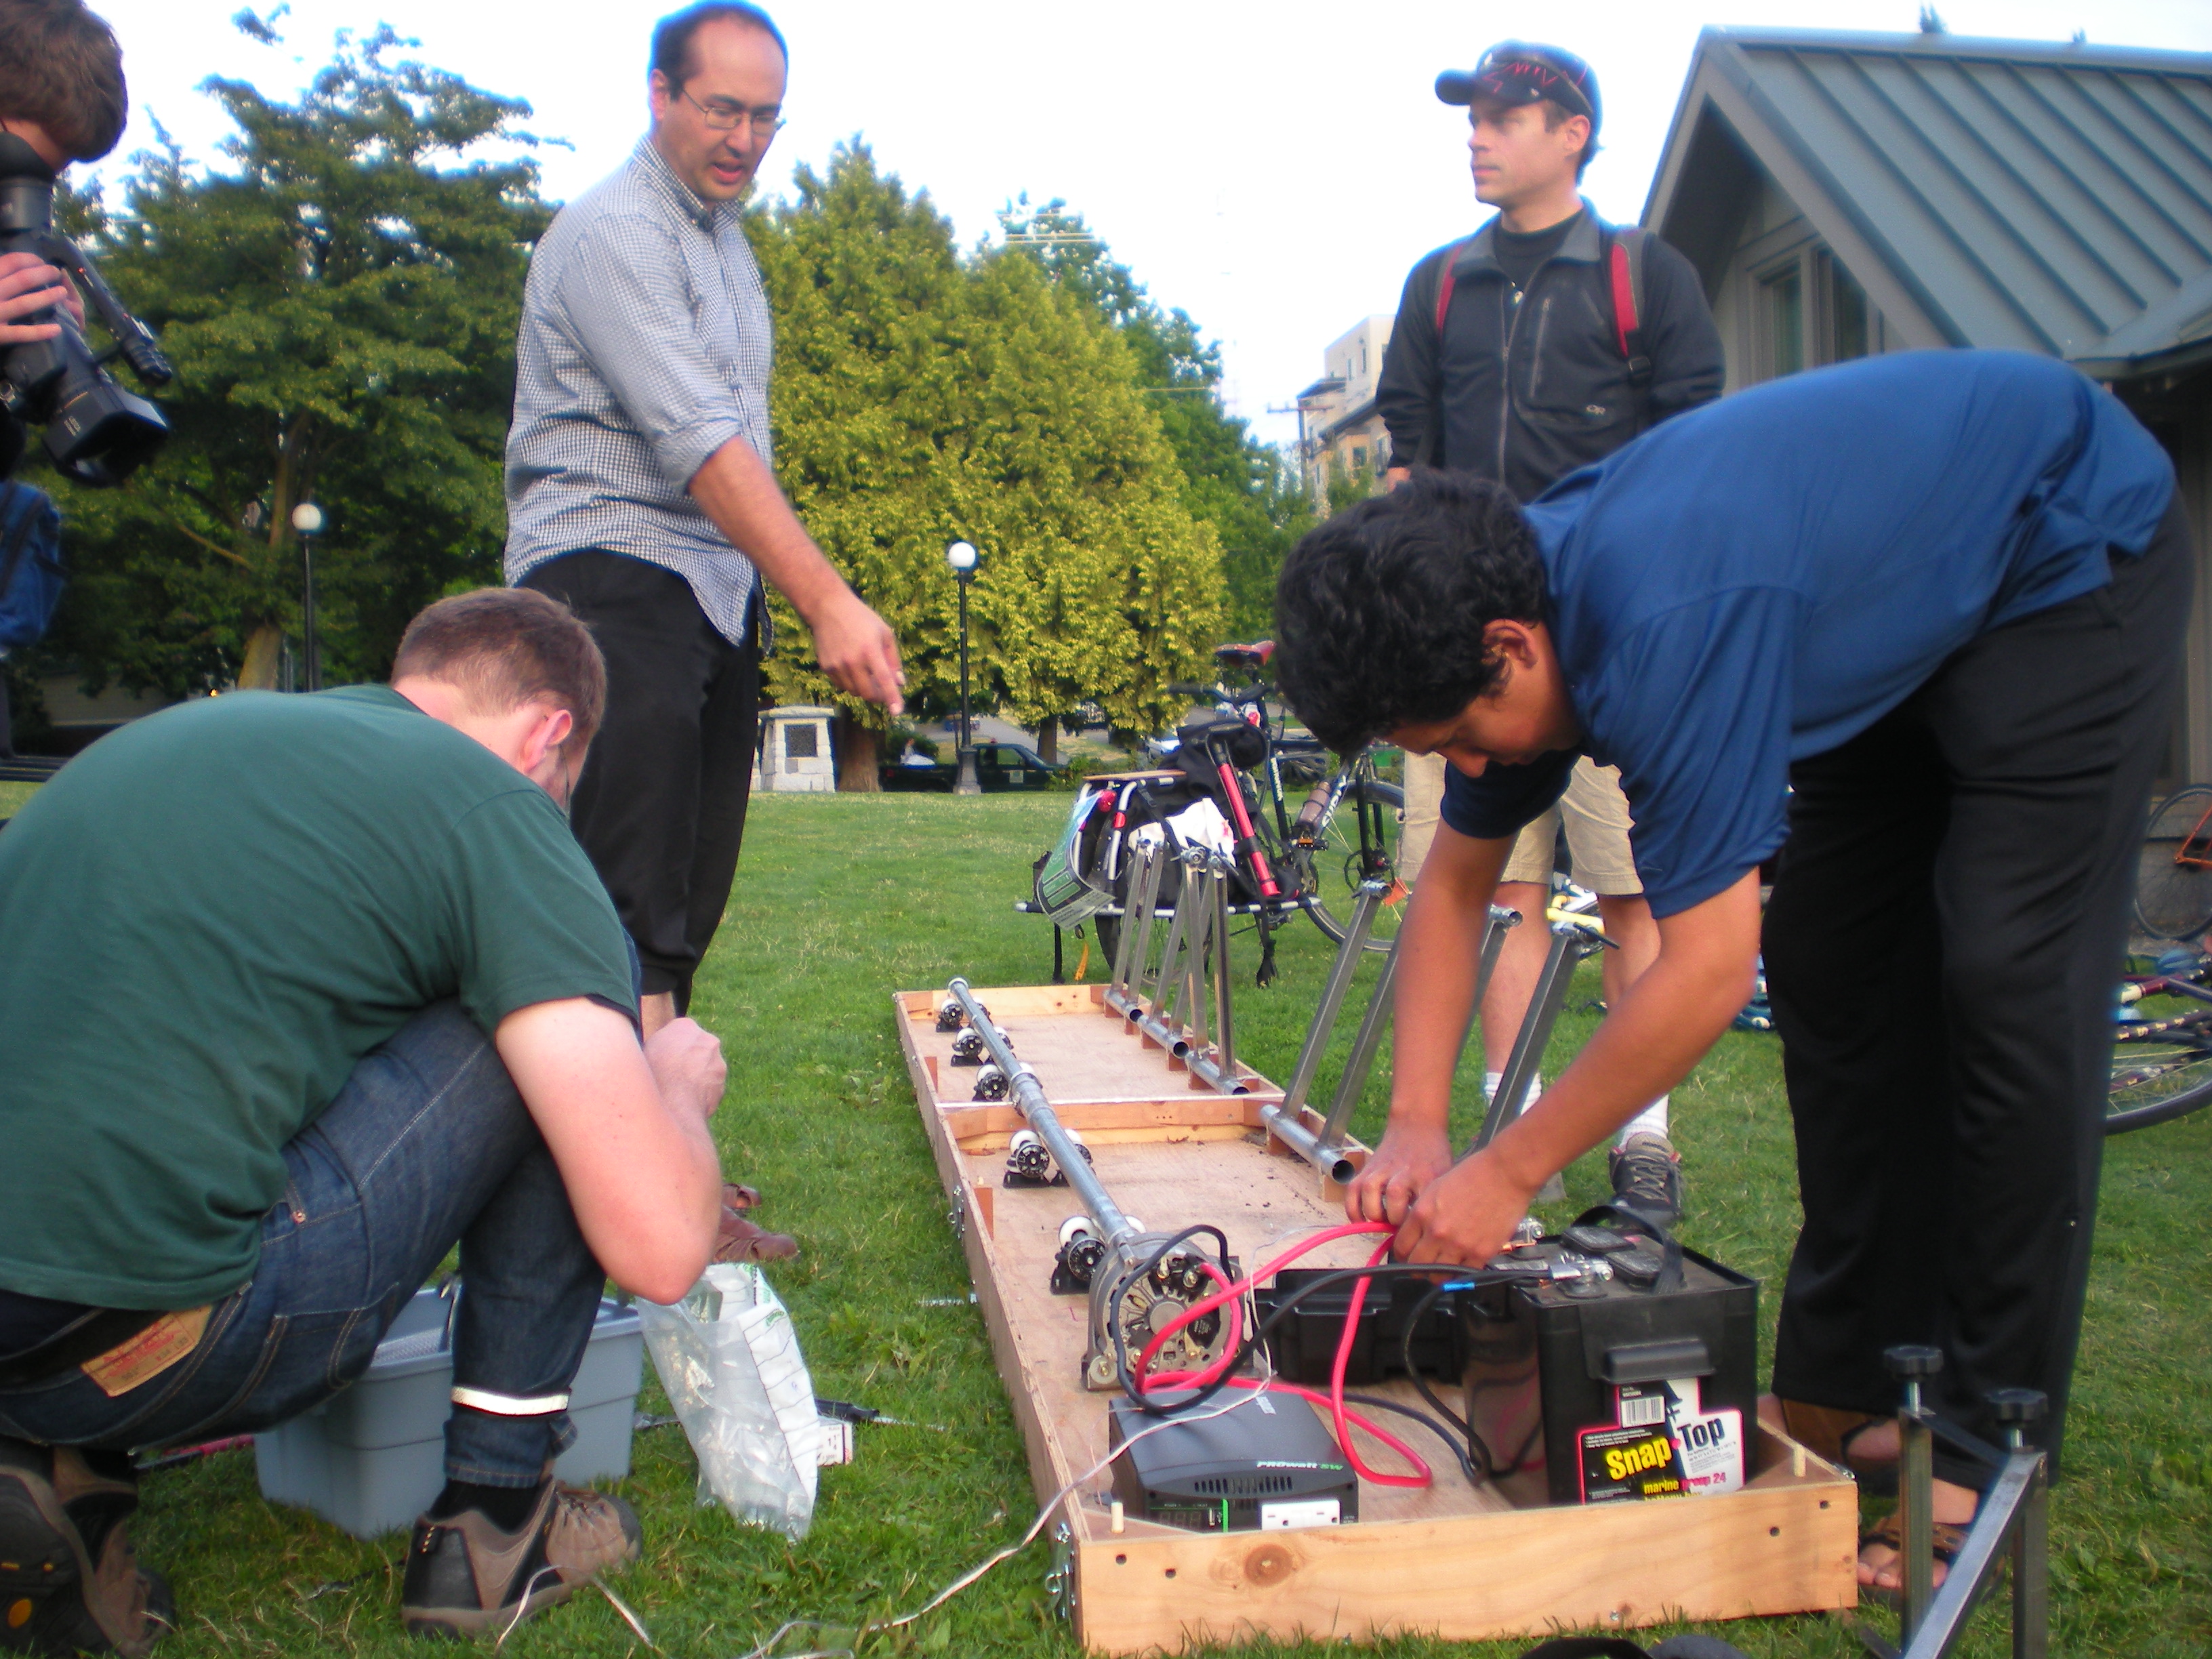
Don’t skimp on critical components!
We made the mistake of taking our shaft bearings from the cheapest skateboards we could find ($25 apiece). Within an hour of use, the loose ball bearings inside had burned up all their lubrication and had moved on to burning up the polyurethane wheels:
Melted and deformed skateboard wheels. Chrystal Lin, 2010
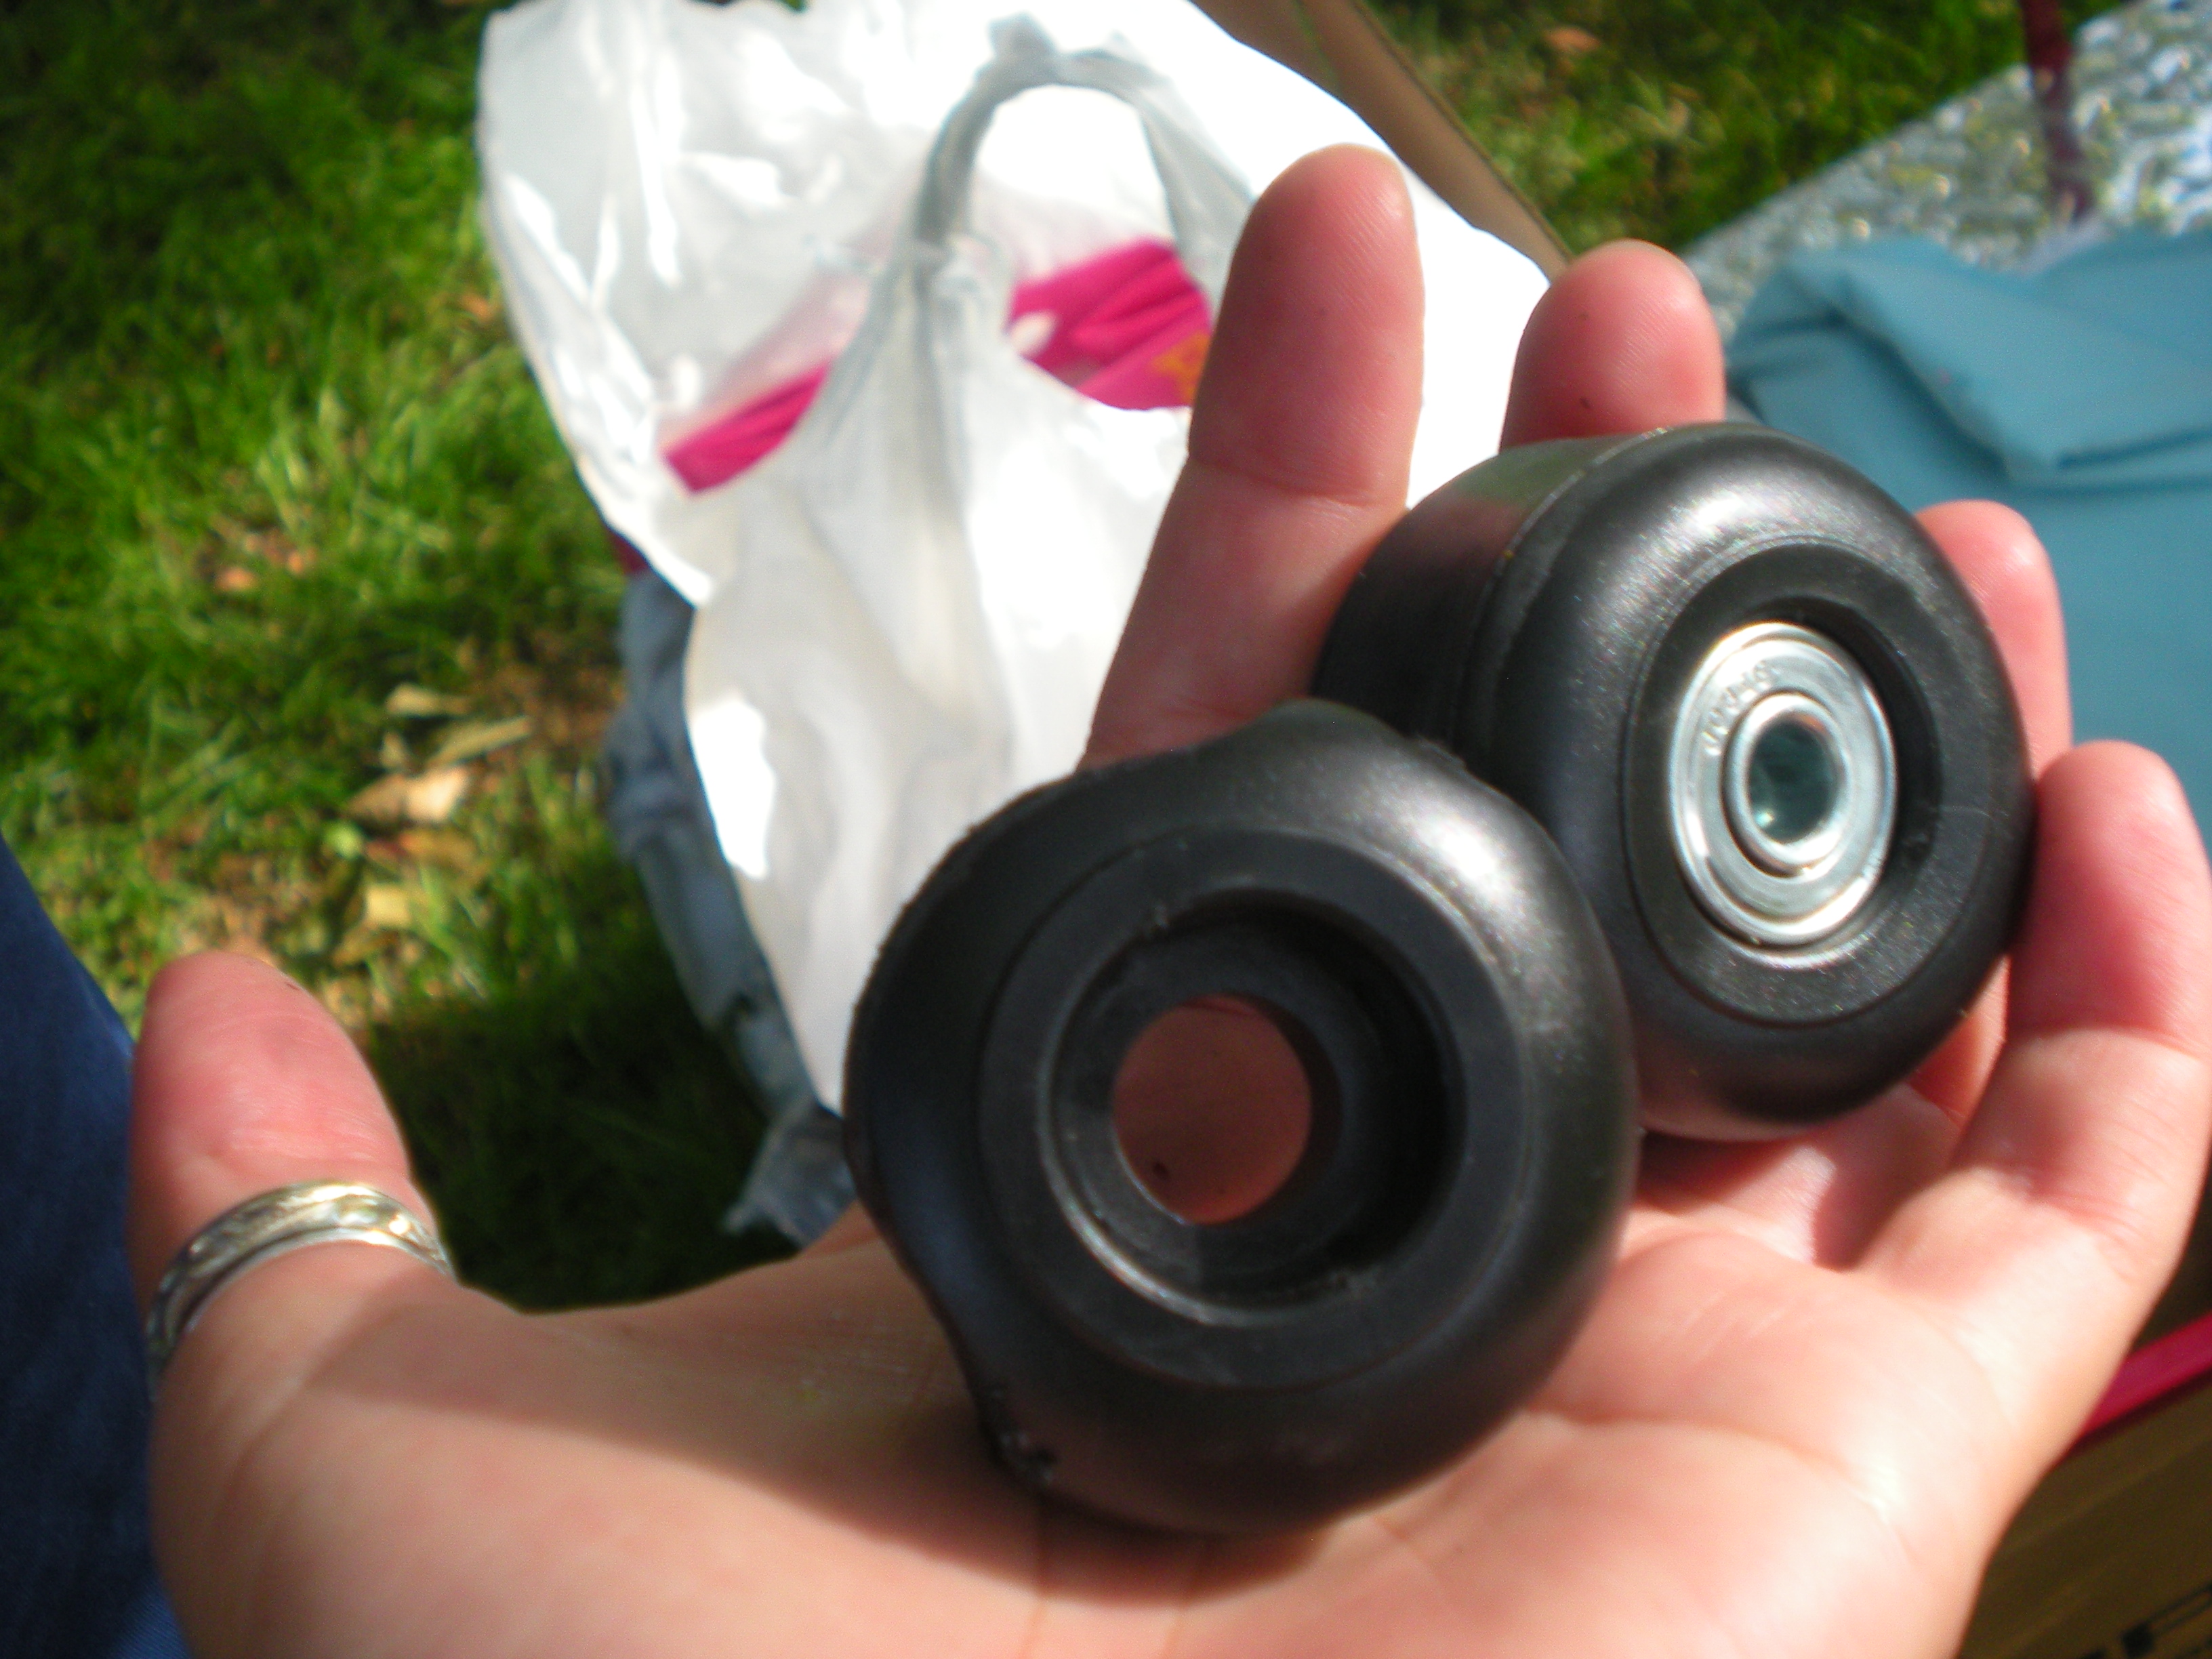
The wheels rapidly conformed to the shape of the shaft and stopped spinning, polishing the shaft nicely and sprinkling shredded polyurethane all over the generator floor:
The above photographer was sent on a mission to a nearby skateshop (which kindly opened an hour early) for 20 high quality skateboard wheels and bearings (which cost about as much as five complete $25 skateboards), and the show went on.